Introduction
In this blog, we want to demonstrate the simplification that the new AWS IoT Custom Authentication can provide. Thus far, users were limited to using the authentication methods provided by AWS itself, being either the use of AWS IAM access keys (when connecting over WebSockets) or the use of certificates - which are to be managed using the AWS IoT Console. However, this new custom authentication allows us to reuse an already existing authentication mechanism together with AWS IoT Core.
This new functionality removes some burden from the developers wanting to implement a single authentication mechanism (e.g., OAuth) for several connections. Before the availability of the new custom authentication method, the application either had to create certificates (e.g., by using an API call to register the necessary credentials on the IoT Core platform) or use WebSockets and use IAM keys to perform the authentication. Retrieving these IAM keys can range from being fairly trivial (e.g., when using Cognito with an Identity Pool) to a much more complex setup if the authentication provider is an external one.
In the next sections, we'll provide an example use case and use this use case to demonstrate how using the (new) custom authentication mechanism can simplify the architecture and ensure a single credential can be used to communicate over different types of connections.
The use case
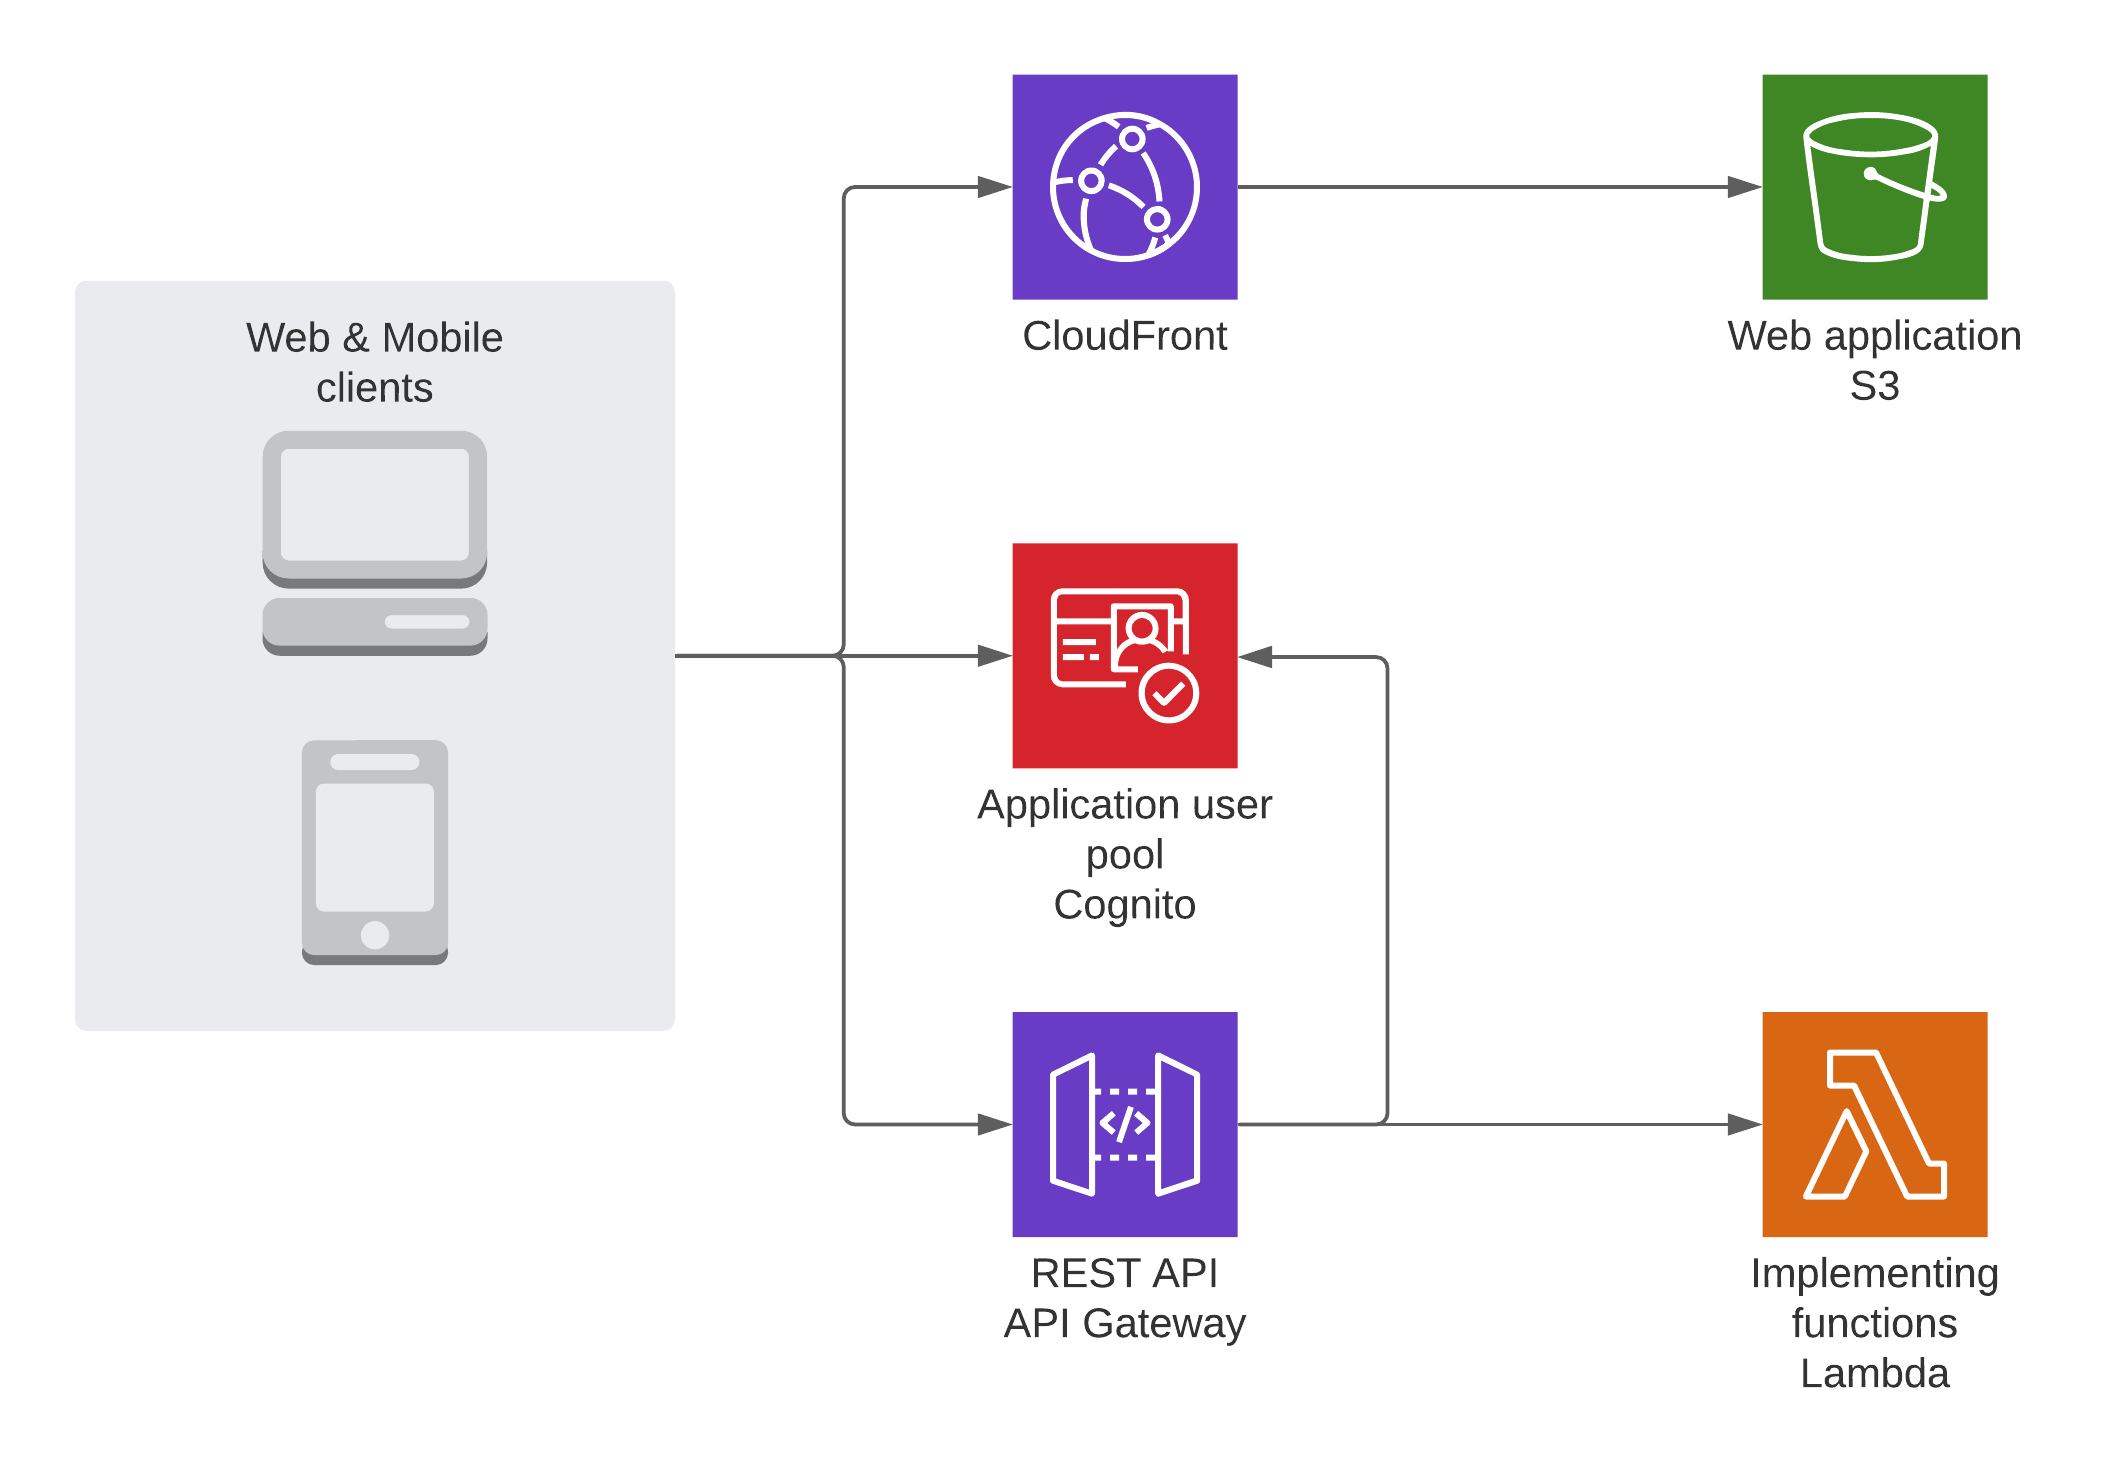
The use case we'll use is very straightforward. We are dealing with an existing application that already contains a classic REST API backed by a set of AWS Lambdas implementing the different services. The REST API is served using Amazon API Gateway and is linked to an Amazon Cognito User Pool for authentication of the calls. There is a React web application that is served to the customers from an Amazon S3 bucket through Amazon CloudFront which communicates with our API after having authenticated against an Amazon Cognito User Pool Client and there is also an accompanying mobile application which is also using the REST API.
The current situation is depicted in the figure below:

The solution without using AWS IoT custom authentication
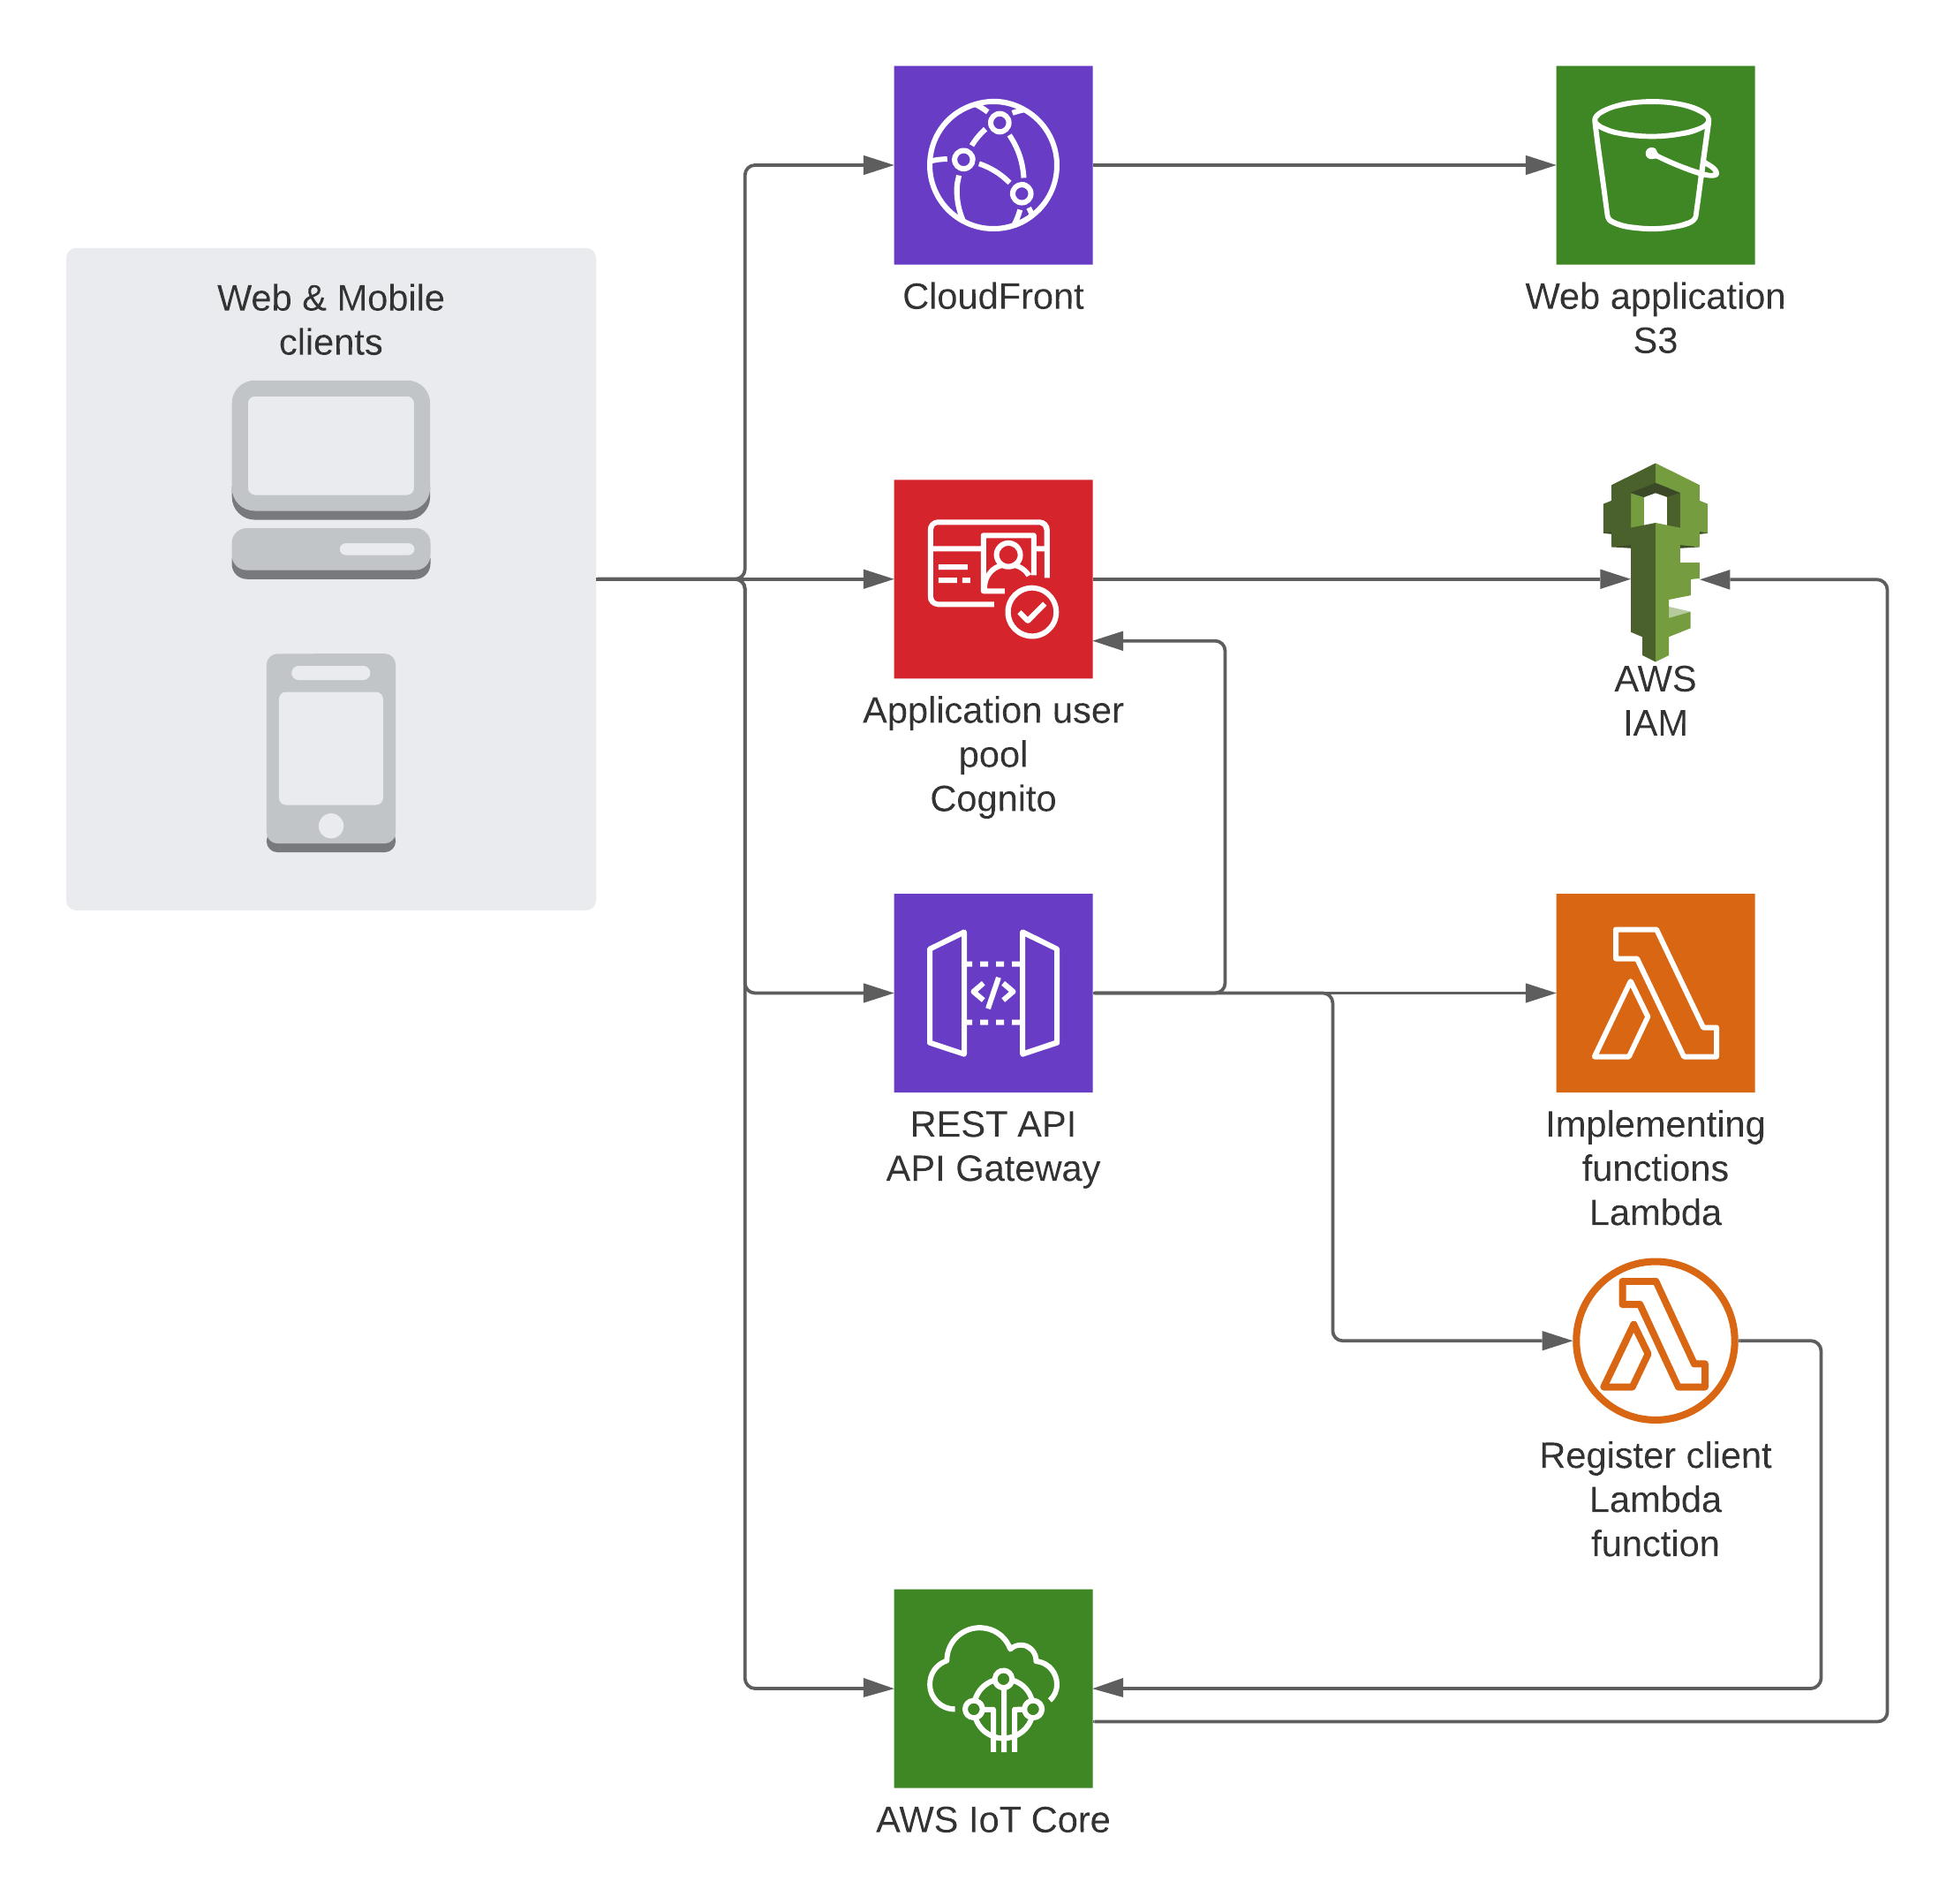
In order to understand the benefits of using the custom authentication for AWS IoT Core, we will first demonstrate how this problem can be solved without using the custom authentication mechanism. For this, we will mostly use the setup from the AWS blog found here The architecture for this solution can be seen in the figure below:

In this solution, it is not possible for any client (mobile or web) to connect to the AWS IoT Core, unless it has registered with the service before. This not only adds additional complexity to the solution but there are also throttling limits on the AWS APIs, which might come into play when there's a high number of users trying to register with IoT at the same time (and some limits are not adjustable link).
This solution only provides mechanisms to authenticate when using secure WebSockets to communicate with the IoT broker provided by AWS. This has certain drawbacks, especially when used on mobile devices. Previous research has shown that it is more efficient to use the lightweight MQTT protocol for these devices, however, in this solution, that would mean that we would need to support a different registration and authentication mechanism for mobile devices as well.
It is clear that there is a lot of extra work and some extra configuration needed to achieve this, which is unpractical. There's also a lot more permissions that need to be set in order for the users to be allowed to connect to the correct topics according to the application requirements.
The solution using AWS IoT custom authentication
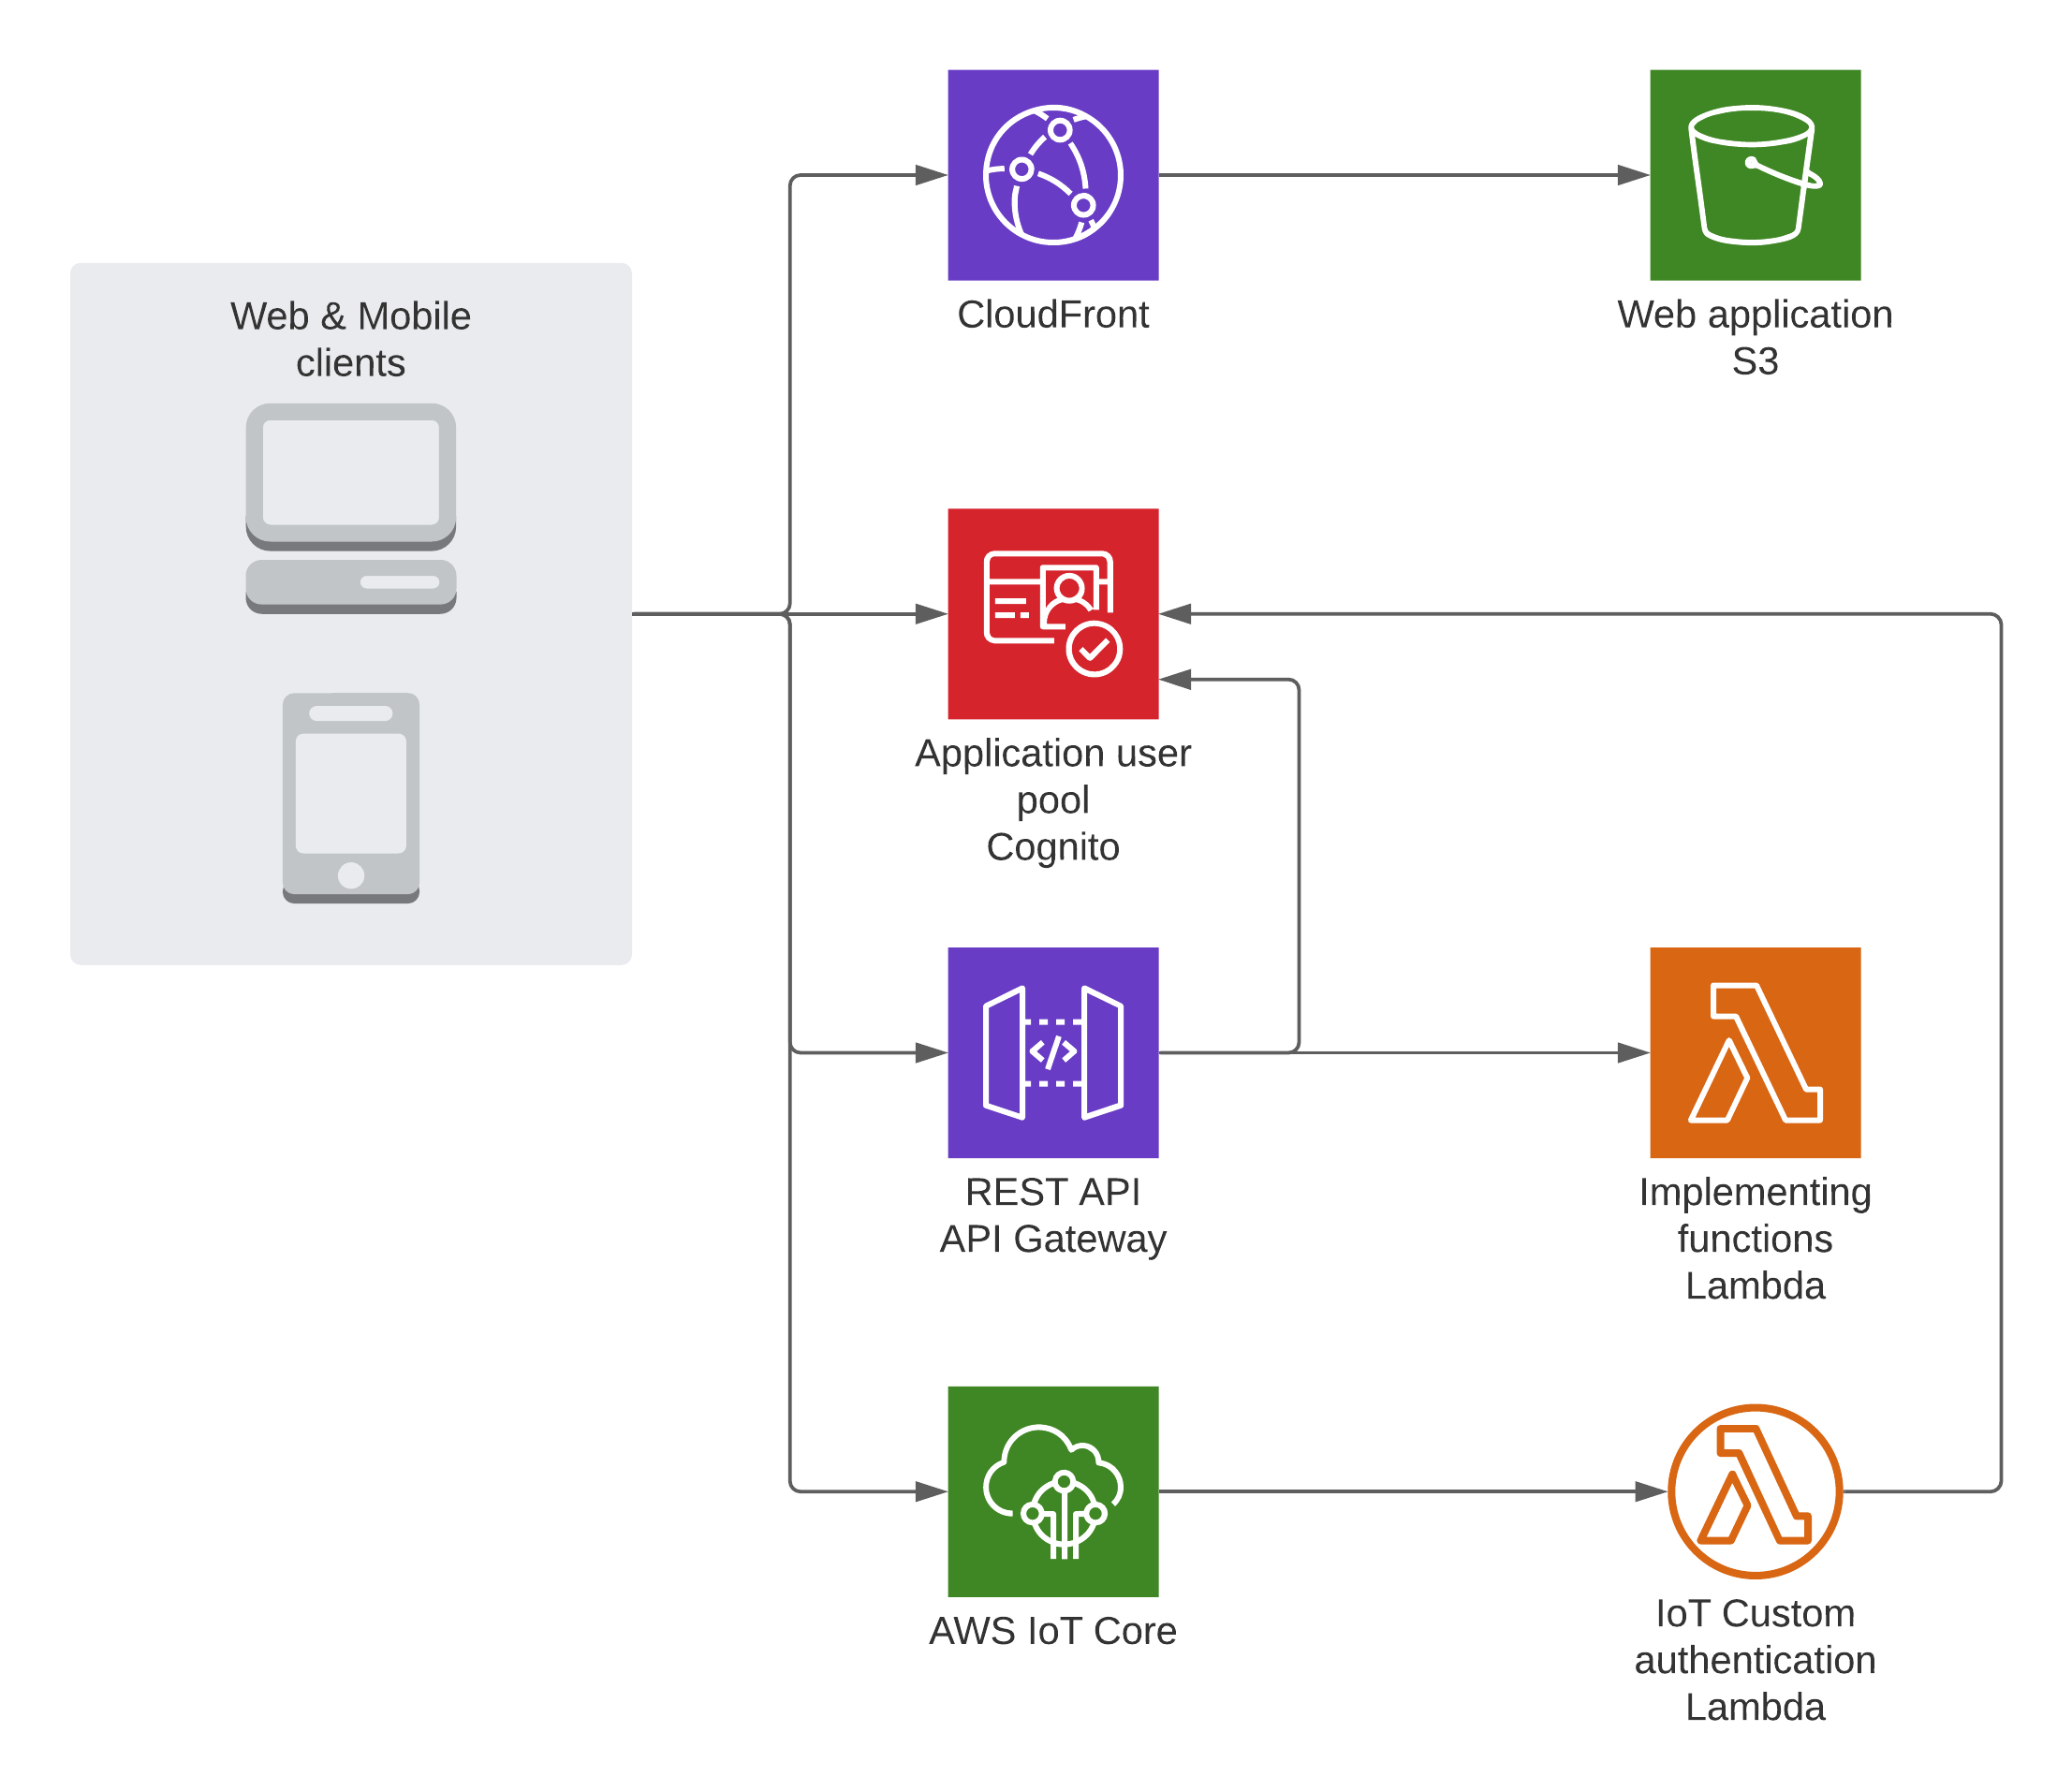
When using the custom authentication functionality provided by the AWS IoT Core platform, the solution becomes much less complex. Custom authentication allows us to use a custom value to identify the user, AWS IoT Core will call the AWS Lambda function you have registered and allows you to return a custom on-the-fly role or deny the user access altogether based on the response value of the AWS Lambda function. This also removes the need for explicit onboarding of the user in the IoT platform, which means we do not need to change the API (or its backing lambda code) in any way to support the new IoT functionality of the application.
For this use case, we will be using the identity token provided by the Amazon Cognito User Pool directly, and use the Cognito keys to verify the validity of the token. If the token is deemed valid, the information contained in the token (in this example use case, the username) will be used to construct a policy that will allow the user to use the AWS IoT Core MQTT message broker according to the requirements.
The result of this architecture is depicted below:

           // Javascript example of an AWS IoT Custom Auth lambda function.
// [...]
async (event) => {
  // [...]
  const { token } = event;
  const decoded = jwt.decode(token, { complete: true });
  jwt.verify(token, jtp(keyStore.get(decoded.header.kid)));
  const { payload: { 'cognito:username': username }} = decoded;
  const policyDocuments = [
    {
      Version: '2012-10-17',
      Statement: [
        {
          Effect: 'Allow',
          Action: ['iot:Connect', 'iot:Receive'],
          Resource: ['*'],
        },
        {
          Effect: 'Allow',
          Action: ['iot:Subscribe', 'iot:Publish'],
          Resource: [
            `arn:aws:iot:${AWS_REGION}:*:topicfilter//event/${username}`,
            `arn:aws:iot:${AWS_REGION}:*:topic//event/${username}`,
          ],
        },
      ],
    },
  ];

  return {
    isAuthenticated: true,
    principalId: username, // A string that identifies the connection in logs.
    ...timing,
    policyDocuments,
  };
  // [...]
};
Want to try it out yourself?
If you're convinced about the benefits of using the IoT custom authentication functionality, or if you're not convinced yet, but want to try it out anyway, a GitHub repository is available with the entire code and tutorials that backs this blog post here. The repository contains all information needed to set up and deploy the tutorial and also some technical details that were left out of this write-up.
Note: The tutorial makes use of the aws-iot-device-sdk for Javascript. However, the current implementation strips the headers of the WebSocket upgrade request, making the custom authentication unusable. Hence in the tutorial, a fork of the repo is used as a dependency. A PR was also raised on the AWS repository on GitHub. You can find the PR here.
Want more?
If you want to know more about the AWS IoT custom authentication, you can have a look at the custom auth section in the AWS IoT Core user guide or have a look at the Custom Auth tutorial from Amazon.
Original posted here

